
HBase agents integrate with the HBase Master and HBase Region Servers.
![[Note]](../common/images/admon/note.png) | Note |
|---|---|
When adding an HBase Repository you must install the Security Agent for HBase on the HBase Master and each of the HBase Region Servers in your cluster and ensure that the configuration settings are the same on each Region Server. |
Before installing the agent on the HBase Regional Servers, create an HBase Repository as follows:
Sign in to the HDP Security Administration Web UI.
Click .
The Manage Repository page displays.
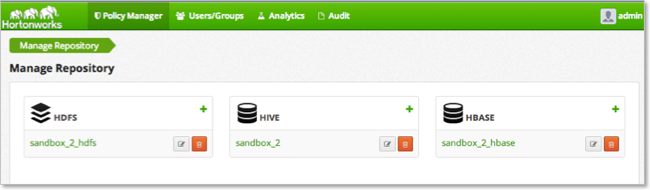
Next to HBase, click the + (plus symbol).
The Create Repository page displays.

Complete the Repository Details with the following information:
Table 4.7. HBase Repository Details
Label Value Description Repository Name $nameSpecify a unique name for the repository, you will need to specify the same repository name in the agent installation properties. For example, clustername_hbase.Description $description-of-repoEnter a description up to 150 characters. Active Status EnabledorDisabledEnable or disable policy enforcement for the repository. Repository type HDFS,Hive, orHBaseSelect the type of repository, HBase. User name $userSpecify a user name on the remote system with permission to establish the connection, for example hbase.Password $passwordSpecify the password of the user account for connection. Complete the HBase Configuration:

The settings must match the values specified in the
core-site.xmlandhbase-site.xmlfile as follows:Table 4.8. HBase Configuration
Label Value File fs.default.name $hdfs-urlcore-site.xmlFor example,hdfs://sandbox.hortonworks.com:8020hadoop.security.authorization truecore-site.xmlIf this field is false, then change to true in core-site before you continue.hadoop.security.authentication simpleorkerberoscore-site.xmlhadoop.security.auth_to_local $usermappingcore-site.xmlFor example:RULE:[2:$1@$0]([rn]m@.*)s/.*/yarn/ RULE:[2:$1@$0](jhs@.*)s/.*/mapred/ RULE:[2:$1@$0]([nd]n@.*)s/.*/hdfs/ RULE:[2:$1@$0](hm@.*)s/.*/hbase/ RULE:[2:$1@$0](rs@.*)s/.*/hbase/ DEFAULTdfs.datanode.kerberos.principal $dn-principalSpecify the Kerberos DataNode principal name. dfs.namenode.kerberos.principal $nn-principalSpecify the Kerberos NameNode principal name. dfs.secondary.namenode.kerberos.principal $secondary-nn-principalSpecify the Kerberos Secondary NN principal name. hbase.master.kerberos.principal $hbase-principalSpecify the Kerberos principal for the HBase Master. hbase.rpc.engine org.apache.hadoop.hbase.ipc.SecureRpcEngine hbase-site.xmlhbase.rpc.protection PRIVACYhbase-site.xmlhbase.security.authentication simplehbase-site.xmlhbase.zoopkeeper.property.clientPort 2181hbase-site.xmlhbase.zookeeper.quorom hbase-site.xmlzookeeper.znode.parent /hbasehbase-site.xmlCommon Name For Certificate $cert-nameSpecify the name of the certificate. Note The blank fields are optional.
Click .
If the server can connect to HBase, the connection successful message displays.
HDP Security Administration server connects to HBase and lists the tables. Hortonworks recommends creating the repository and installing the agent after HBase contains data. If HBase connection fails (and tables exist), go to the troubleshooting appendix.
After making a successful connection, click .
The repository is created with an open access Policy, that is auditing is enabled and all users are allowed to access the resources. Complete the installation of the agent and do a few simple access test before configuring policies to ensure that the solution is working properly.
Use same installation properties file to install the Security Agent for HBase. Install the agent on all of the following HBase hosts:
HBase Master host
All HBase Region Server hosts
Log on to the host as
root.Create a temporary directory, such as
/tmp/xasecure:mkdir /tmp/xasecure
Move the package into the temporary directory along with the MySQL Connector Jar.
Extract the contents:
tar xvf $xasecureinstallation.tar
Go to the directory where you extracted the installation files:
cd /tmp/xasecure/xasecure-$name-$build-version
Open the
install.propertiesfile for editing.Change the following parameters for your environment:
Table 4.9. Hive Agent Install Parameters
Parameter Value Description POLICY_MGR_URL$urlSpecify the full URL to access the Policy Manager Web UI. For example, http://pm-host:6080.MYSQL_CONNECTOR_JAR$path-to-mysql-connectorAbsolute path on the local host to the JDBC driver for mysql including filename.[a] For example, /tmp/xasecure/REPOSITORY_NAME$Policy-Manager-Repo-NameName of the HDFS Repository in the Policy Manager that this agent connects to after installation. XAAUDIT.DB.HOSTNAME$XAsecure-db-hostSpecify the host name of the MySQL database. XAAUDIT.DB.DATABASE_NAME$auditdbSpecify the audit database name that matches the audit_db_namespecified during installation.XAAUDIT.DB.USER_NAME$auditdbuserSpecify the audit database name that matches the audit_db_userspecified during installation.XAAUDIT.DB.PASSWORD$auditdbupwSpecify the audit database name that matches the audit_db_passwordspecified during installation.Save the
install.propertiesfile.
| Note |
|---|---|
If your environment is configured to use SSL, modify the properties following the instructions in Set Up SSL for HBase Security Agents. |
The following is an example of the HBase
install.properties:
#
# Location of Policy Manager URL
#
#
# Example:
# POLICY_MGR_URL=http://policymanager.xasecure.net:6080
#

POLICY_MGR_URL=http://policymgr:6080

#
# Location of mysql client library (please check the location of the jar file)
#
MYSQL_CONNECTOR_JAR=/usr/share/java/mysql-connector-java.jar

#
# This is the repository name created within policy manager
#
# Example:
# REPOSITORY_NAME=hbasedev
#

REPOSITORY_NAME=sandbox_2_hbase

#
# AUDIT DB Configuration
#
#  This information should match with the one you specified during the PolicyManager Installation
#
# Example:
# XAAUDIT.DB.HOSTNAME=localhost
# XAAUDIT.DB.DATABASE_NAME=xasecure
# XAAUDIT.DB.USER_NAME=xalogger
# XAAUDIT.DB.PASSWORD=
#
#

XAAUDIT.DB.HOSTNAME=xasecure
XAAUDIT.DB.DATABASE_NAME=xasecure
XAAUDIT.DB.USER_NAME=xasecure
XAAUDIT.DB.PASSWORD=hadoop


#
# SSL Client Certificate Information
#
# Example:
# SSL_KEYSTORE_FILE_PATH=/etc/xasecure/conf/xasecure-hadoop-client.jks
# SSL_KEYSTORE_PASSWORD=clientdb01
# SSL_TRUSTSTORE_FILE_PATH=/etc/xasecure/conf/xasecure-truststore.jks
# SSL_TRUSTSTORE_PASSWORD=changeit

#
# IF YOU DO NOT DEFINE SSL parameters, the installation script will automatically generate necessary key(s) and assign appropriate values
# ONLY If you want to assign manually, please uncomment the following variables and assign appropriate values.
After configuring the install.properties file, install the
agent as root:
Log on to the Linux system as root and go to the directory where you extracted the installation files:
cd /tmp/xasecure/xasecure-$name-$build-version
Run the agent installation script:
# ./install.sh
Changes to the properties require a restart of the HBase services.
To restart HBase:
Execute this command on the HBase Master host machine:
su -l hbase -c "/usr/lib/hbase/bin/hbase-daemon.sh --config /etc/hbase/conf stop master; sleep 25"
Execute this command on all RegionServers:
su -l hbase -c "/usr/lib/hbase/bin/hbase-daemon.sh --config /etc/hbase/conf stop regionserver"
Execute this command on the HBase Master host machine:
su -l hbase -c "/usr/lib/hbase/bin/hbase-daemon.sh --config /etc/hbase/conf start master; sleep 25"
Execute this command on all RegionServers:
su -l hbase -c "/usr/lib/hbase/bin/hbase-daemon.sh --config /etc/hbase/conf start regionserver"
HDP Security Administration requires that the following properties are set in the
hbase-site.xml. Configure these properties and restart
Hbase before creating a repository in the Policy Manager.
Table 4.10. Custom hbase-site.xml Parameters
| Key | Value |
|---|---|
| hbase.security.authorization | true |
| hbase.coprocessor.master.classes | com.xasecure.authorization.hbase.XaSecureAuthorizationCoprocessor |
| hbase.coprocessor.region.classes | org.apache.hadoop.hbase.security.token.TokenProvider,org.apache.hadoop.hbase.security.access.SecureBulkLoadEndpoint,com.xasecure.authorization.hbase.XaSecureAuthorizationCoprocessor |
| hbase.rpc.engine | org.apache.hadoop.hbase.ipc.SecureRpcEngine |
| hbase.rpc.protection | PRIVACY |
Use these instructions to update the Hbase properties in the Ambari UI.
Log into the Ambari Web UI, and click > .
Note To find a parameter, type the parameter name in the Filter field and press enter; if the parameter exists, it is returned under list. Click the arrow key to expand the lists and see the parameter settings.
Update the following properties from the Ambari Default Value to the HDP Security required values:
Table 4.11. HBase Parameter Values
HBase Property Ambari Default Value HDP Security Required Value hbase.security.authorizationfalsetrueExpand , and add the following properties:
Table 4.12. Custom hbase-site.xml Properties
Key Value hbase.coprocessor.master.classes com.xasecure.authorization.hbase.XaSecureAuthorizationCoprocessor hbase.coprocessor.region.classes org.apache.hadoop.hbase.security.token.TokenProvider,org.apache.hadoop.hbase.security.access.SecureBulkLoadEndpoint,com.xasecure.authorization.hbase.XaSecureAuthorizationCoprocessor hbase.rpc.protection PRIVACY Note For each property, click , enter Key and Value shown in the table above, then click .
After all the properties have been updated or added, click .
The properties display.

When properties change, the affected services must be restarted. A Restart option appears.
Click > .
Connected Agents display in the HDP Security Administration Web UI.
| Note |
|---|---|
Agents may not appear in the list until after the first event occurs in the repository. |
To verify that the agent is connected to the server:
Log in to the interface using the admin account.
Click > .
After the repository is set up and you have verified that the agent is connected to the server, perform a few basic HBase test as outlined below:
Open a browser and go to
http://hue-host:8888.Click on the icon in the navigation pane.
Click .
The prompt displays.
hbase(main):001:0>
At the prompt type
list.hbase(main):001:0> list list TABLE SLF4J: Class path contains multiple SLF4J bindings. SLF4J: Found binding in [jar:file:/usr/lib/hadoop/lib/slf4j-log4j12-1.7.5.jar!/org/slf4j/impl/StaticLoggerBinder.class] SLF4J: Found binding in [jar:file:/usr/lib/zookeeper/lib/slf4j-log4j12-1.6.1.jar!/org/slf4j/impl/StaticLoggerBinder.class] SLF4J: See http://www.slf4j.org/codes.html#multiple_bindings for an explanation. ambarismoketest test 2 row(s) in 4.9490 seconds => ["ambarismoketest", "test"]
The XASecure HBase agent reports the activity to the server.
Note If the HBase command fails with the following Zookeeper error, restart HBase with the root user account from the command line and retest.
ERROR: Can't get master address from ZooKeeper; znode data == null
Sign in to the Web UI and click .
The Big Data page displays a list of events for the configured Repositories.
Click > > HBase.
The list filters as you make selections.
